Castle Cairn - In-Game Phone
Not long after completing my course in Unreal Engine 5 I was brought on as an employee for Wee Tattie Studios; I was assigned to work on their upcoming puzzle horror game Castle Cairn.
Set in the titular Scottish castle, the game takes place in first person and it built around solving puzzles to progress through the mysteries of the location’s dark history. The player has access to a few tools to help them, however, one of the most important being their smart phone—I was assigned the task of implementing this feature from scratch.
However, if a picture is worth a thousand words then a video is a thousand pictures, so clearly the best demonstration is the video I have provided below!
Overview
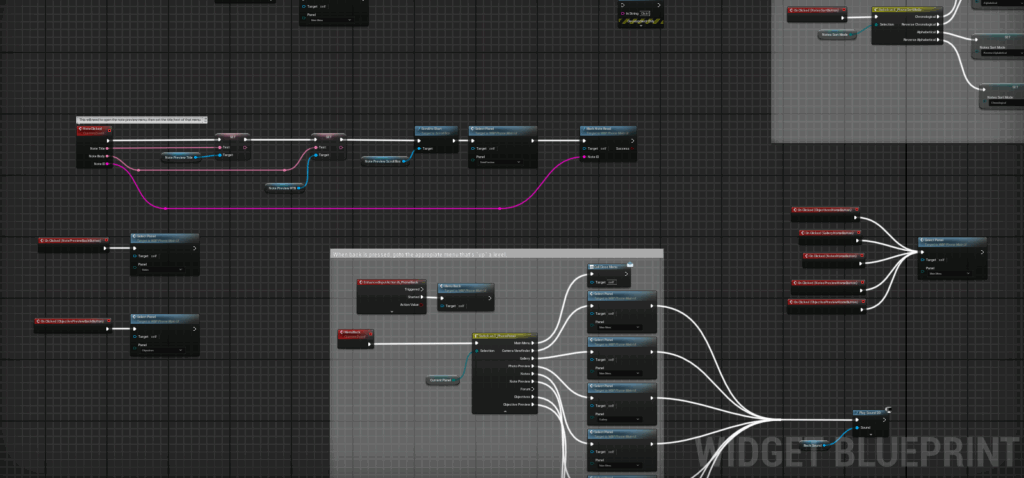
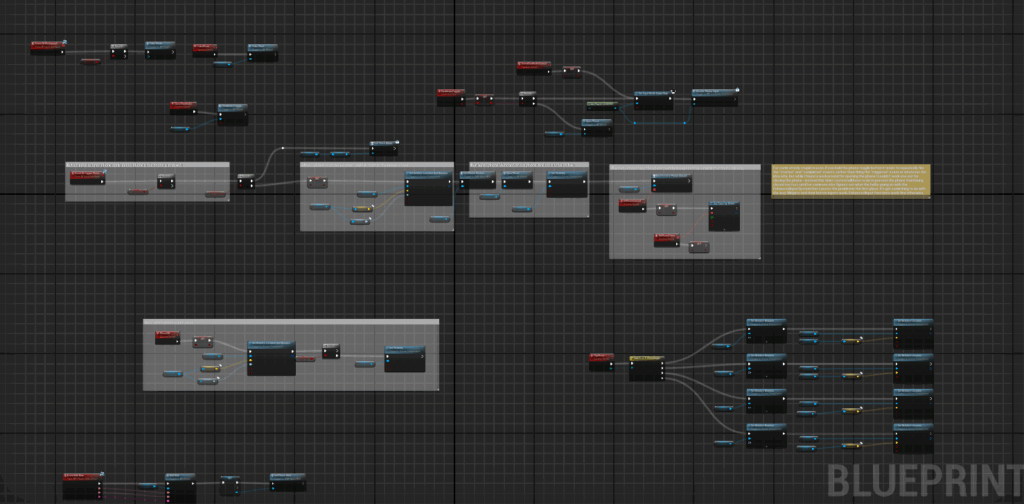
The phone is primarily programmed in Unreal Engine 5 using Blueprints, with some additional C++ to control systems I couldn’t otherwise. There are a lot of them, but here are a few snippets showing off some different parts:
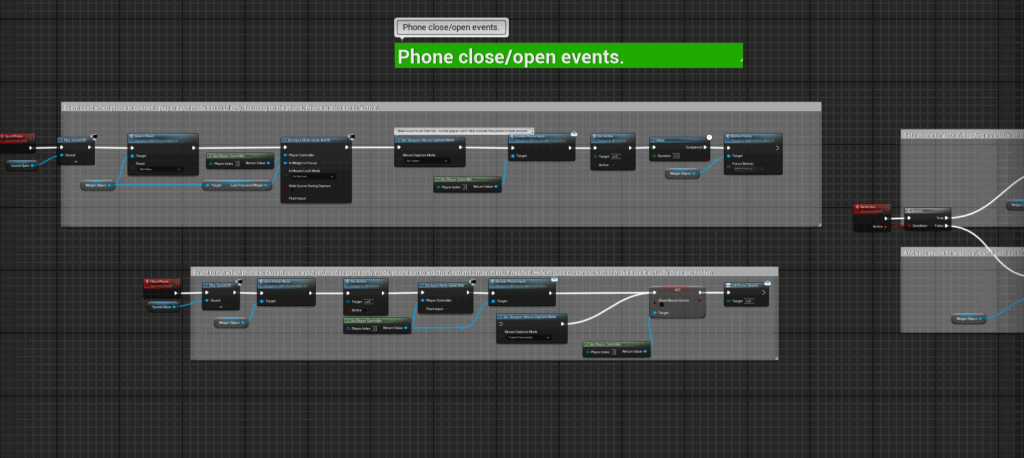
When I was implementing the phone I was given a design document to work off, which covered the required functionality. This included:
The ability to turn it on/off, appearing on screen while active and hidden when not.
A flashlight is attached to it, which when turned on makes the phone appear in the bottom corner of the screen
There are several “apps” with different gameplay features, which include:
A camera app to take pictures of the world.
A gallery app to view these pictures.
A notes app to store collected notes and other useful information.
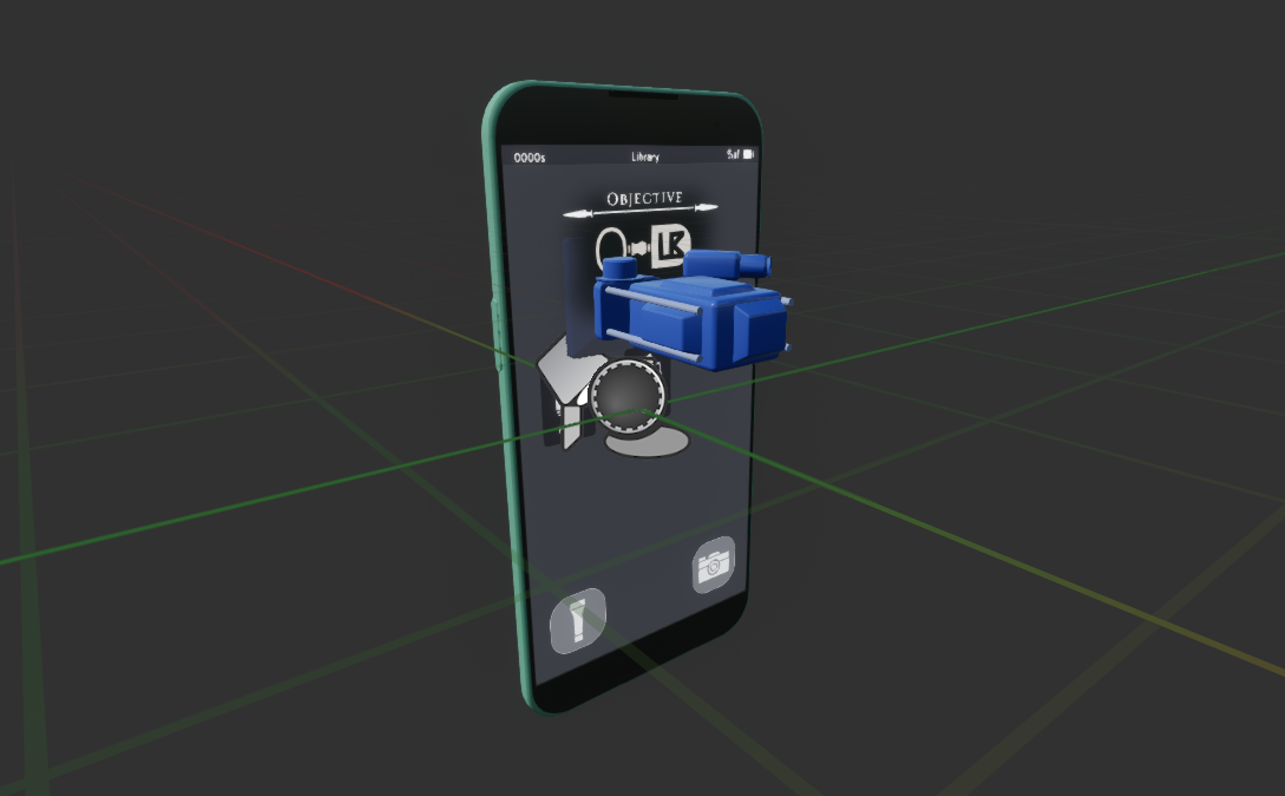
An objectives system to track the player’s current tasks.
A “website” only able to show a forum page indicating background story elements.
The phone should be navigated akin to a standard smart-phone, selecting icons to open up apps and activate different features.
Some sequences may disable the phone, so have a means to indicate this when it’s happening.
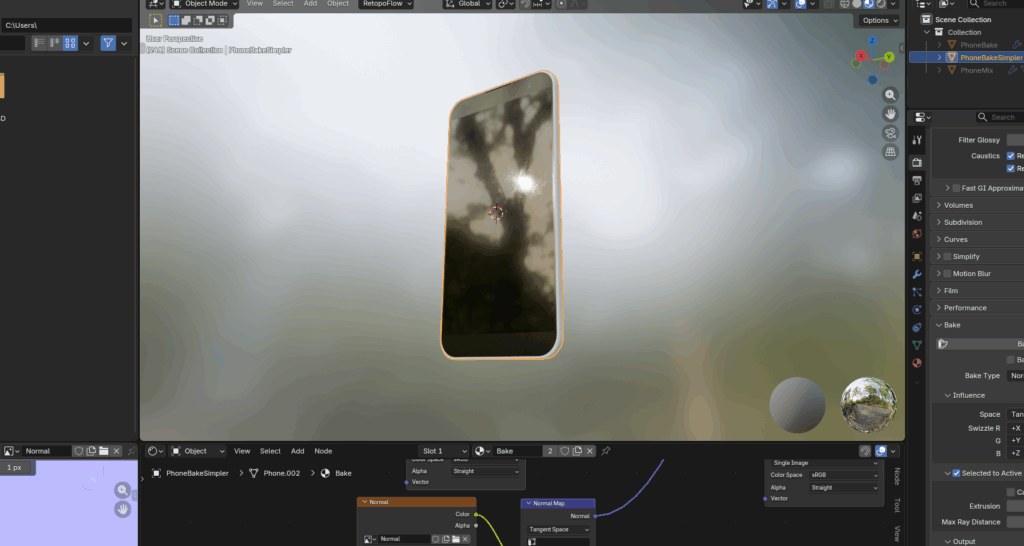
All of these features were implemented as required, and testing/feedback was provided by designers and playtesters to iron out issues and add extra functionality. The phone’s UI elements were designed by an artist I remained in contact with throughout the project (to whom I am very grateful for the assistance!), and the phone was a library asset that I modified in Blender (such as creating proper UVs and improving the texture to have smudge-marks and fingerprints).

All in all, the phone took around two to three months to implement main functionality, with additional bug fixes and polish done sporadically over the following months… of which there was a lot. With a system as complicated as this, there are a lot of things that need to be improved or fixed!
Technical Details
Finally, some additional nitty-gritty details on how the phone was implemented. This doesn’t cover everything since the phone is very(!) complex, but should provide a good idea of important parts.
World-Space Object
Initially the plan was to implement the phone as a screen widget (essentially a 2D element directly projected on-screen), but as one of the required features was a flashlight that makes the phone also appear, I opted to implement the phone as a physical object in the world, attached to the player camera, and to simply move it around based on it’s current “mode”.
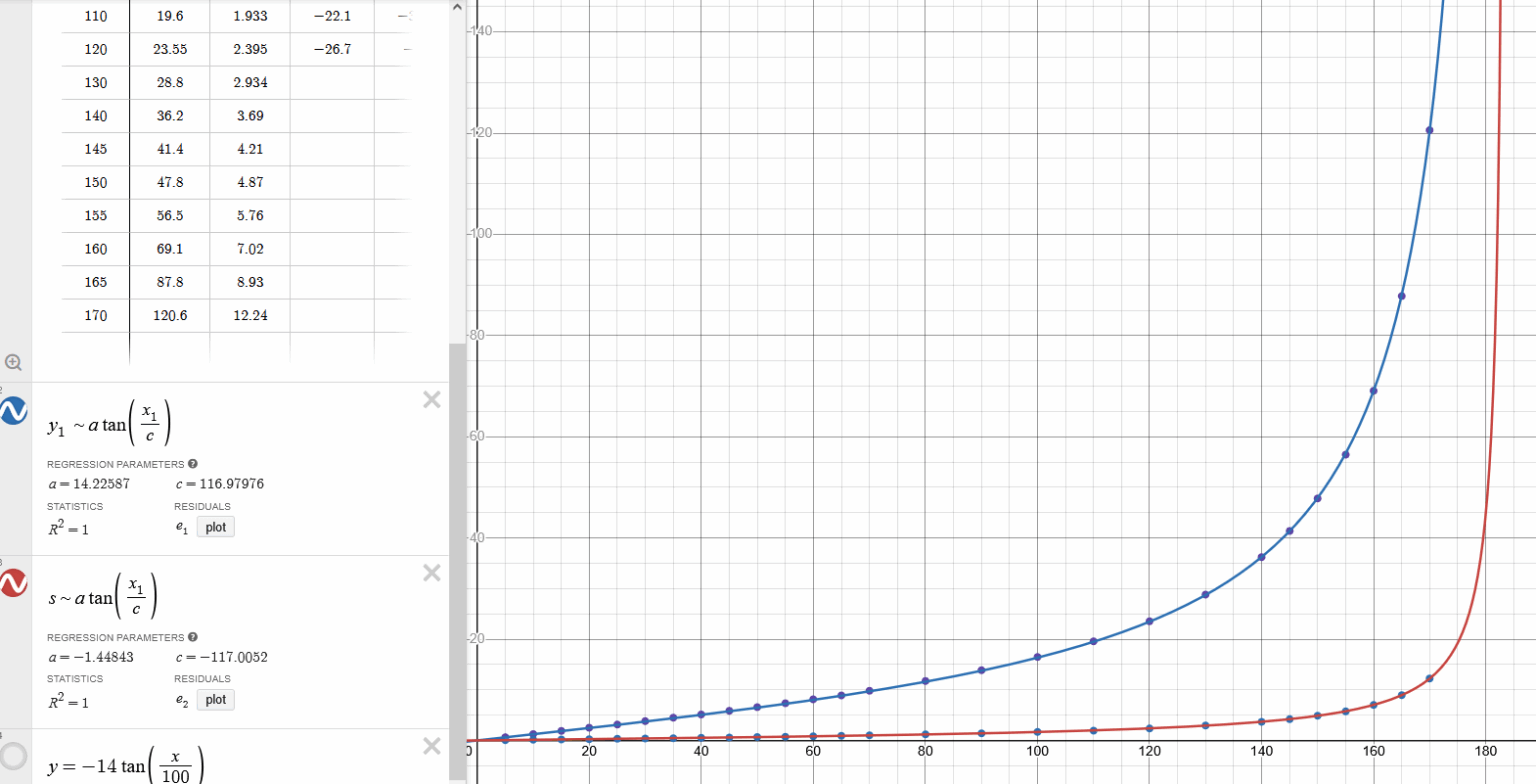
One problem with this approach was that if the camera’s field of view changed, so would the phone’s size and position! To that end, I worked out that using a tangent-based function to shift the phone’s position and scale worked perfectly (due to the nature of camera projection being based off trigonometric functions). These functions only run if the field of view is changed, to reduce the need for complex maths running every frame.
Blueprints Involved
The phone is made up of several connected parts:
A widget UI that handles most of the phone’s control logic (button presses, menus, input handling, etc) as well as the 2D UI design.
A phone actor with the above widget as a component; this handles higher level systems such as mouse position detection, photographing, position changing, etc.
A player blueprint which I heavily modified to
An additional screen-space UI for additional HUD elements, such as an indicator for the phone’s current status and an indicator for when an objective is updated.
These parts were carefully designed so to avoid circular dependencies—when an asset creates a direct reference to a second asset which then references the first—which can create technical problems in the long term. The dependency chain is Player → Phone → Widget, with additional functions using function libraries. If a lower-level object needs to call something from a higher level one, it will use an event dispatcher or a blueprint interface. Wherever possible, I’ve followed good practice like this.
Other Details
Finally, an assortment of other details of the phone’s functionality and how it works, in no particular order:
The camera, uses a SceneCapture2D component to work, which save images as PNG files in the game’s folder. If you really want to, you can change these pictures and load them up in-game!
The phone flips itself sideways for certain modes, namely those related to pictures. Vertical pictures never look very good, after all.
The gallery was very slow to refresh at first since it loaded up every image whenever something changed—I resolved this by only loading all pictures on game start, and otherwise only loading/removing one picture at a time as needed.
A lot of effort was put into making sure the customisable player controls didn’t create any problems with the phone’s control system. For some reason Unreal Engine doesn’t do much of this by default, so I had to add a lot of custom systems for this (C++ code to allow keyboard-based navigation with player moment buttons, changing input map assets on the fly as needed, and more).
The phone is set to be translucent when opened, so to help the player see what’s happening around them. I had to account for transparent backface culling on the phone model to allow this though, otherwise you’d be able to see parts of the phone model’s insides!